Angle Discrimination for the DAT
/Master DAT angle discrimination with proven strategies, visual comparison techniques, test-taking tips, and high-yield practice questions with answers.
----
Part 1: Introduction to angle discrimination
Angle discrimination, also called angle ranking, is the third section of the PAT. By this point, you’ve already completed the apertures and view recognition sections (if you chose to go in order). Unlike those sections, angle ranking doesn’t require you to visualize and manipulate 3-dimensional objects. This section is more straightforward, as it only requires you to rank 4 angles from smallest to largest.
This guide will teach you everything you need to know about angle discrimination for the PAT, including strategies to help you succeed. Take advantage of the questions and answers at the end of this guide by practicing these strategies.
----
Part 2: Rules and Strategies
The prompt for each angle discrimination question looks like this:
FIGURE 1: ANGLE DISCRIMINATION EXAMPLE QUESTION
There are 4 different angles, and you are tasked with ranking them in order from smallest to largest. Each question has four answer choices.
A) 2-1-4-3
B) 2-1-3-4
C) 1-2-4-3
D) 1-3-2-4
The left number represents the smallest angle, while the rightmost number is the largest. The answer to this question is B.
FIGURE 2: EXAMPLE QUESTION ANSWER
For this problem, there was a 5 degree difference between the closest angles. Angle ranking problems can have a difference of as little as 3 degrees. Also, prompts can include acute, obtuse, or right angles, all of which may be positioned differently. This section may initially seem intimidating, but with practice and strategy, you can develop an eye for angles and achieve your highest score.
One rule you need to know is that you are always ranking the interior angle. Technically, each angle has an interior (<180°) and exterior angle (>180°), such as in the figure below. Ignore the exterior angle for the angle discrimination section.
FIGURE 3: ONLY RANK THE INTERIOR ANGLE
So, how exactly can you develop an eye for angle ranking? Well, there are some visualization techniques that can help you discriminate between similar angles. Let’s go through the different techniques for acute, right, and obtuse angles.
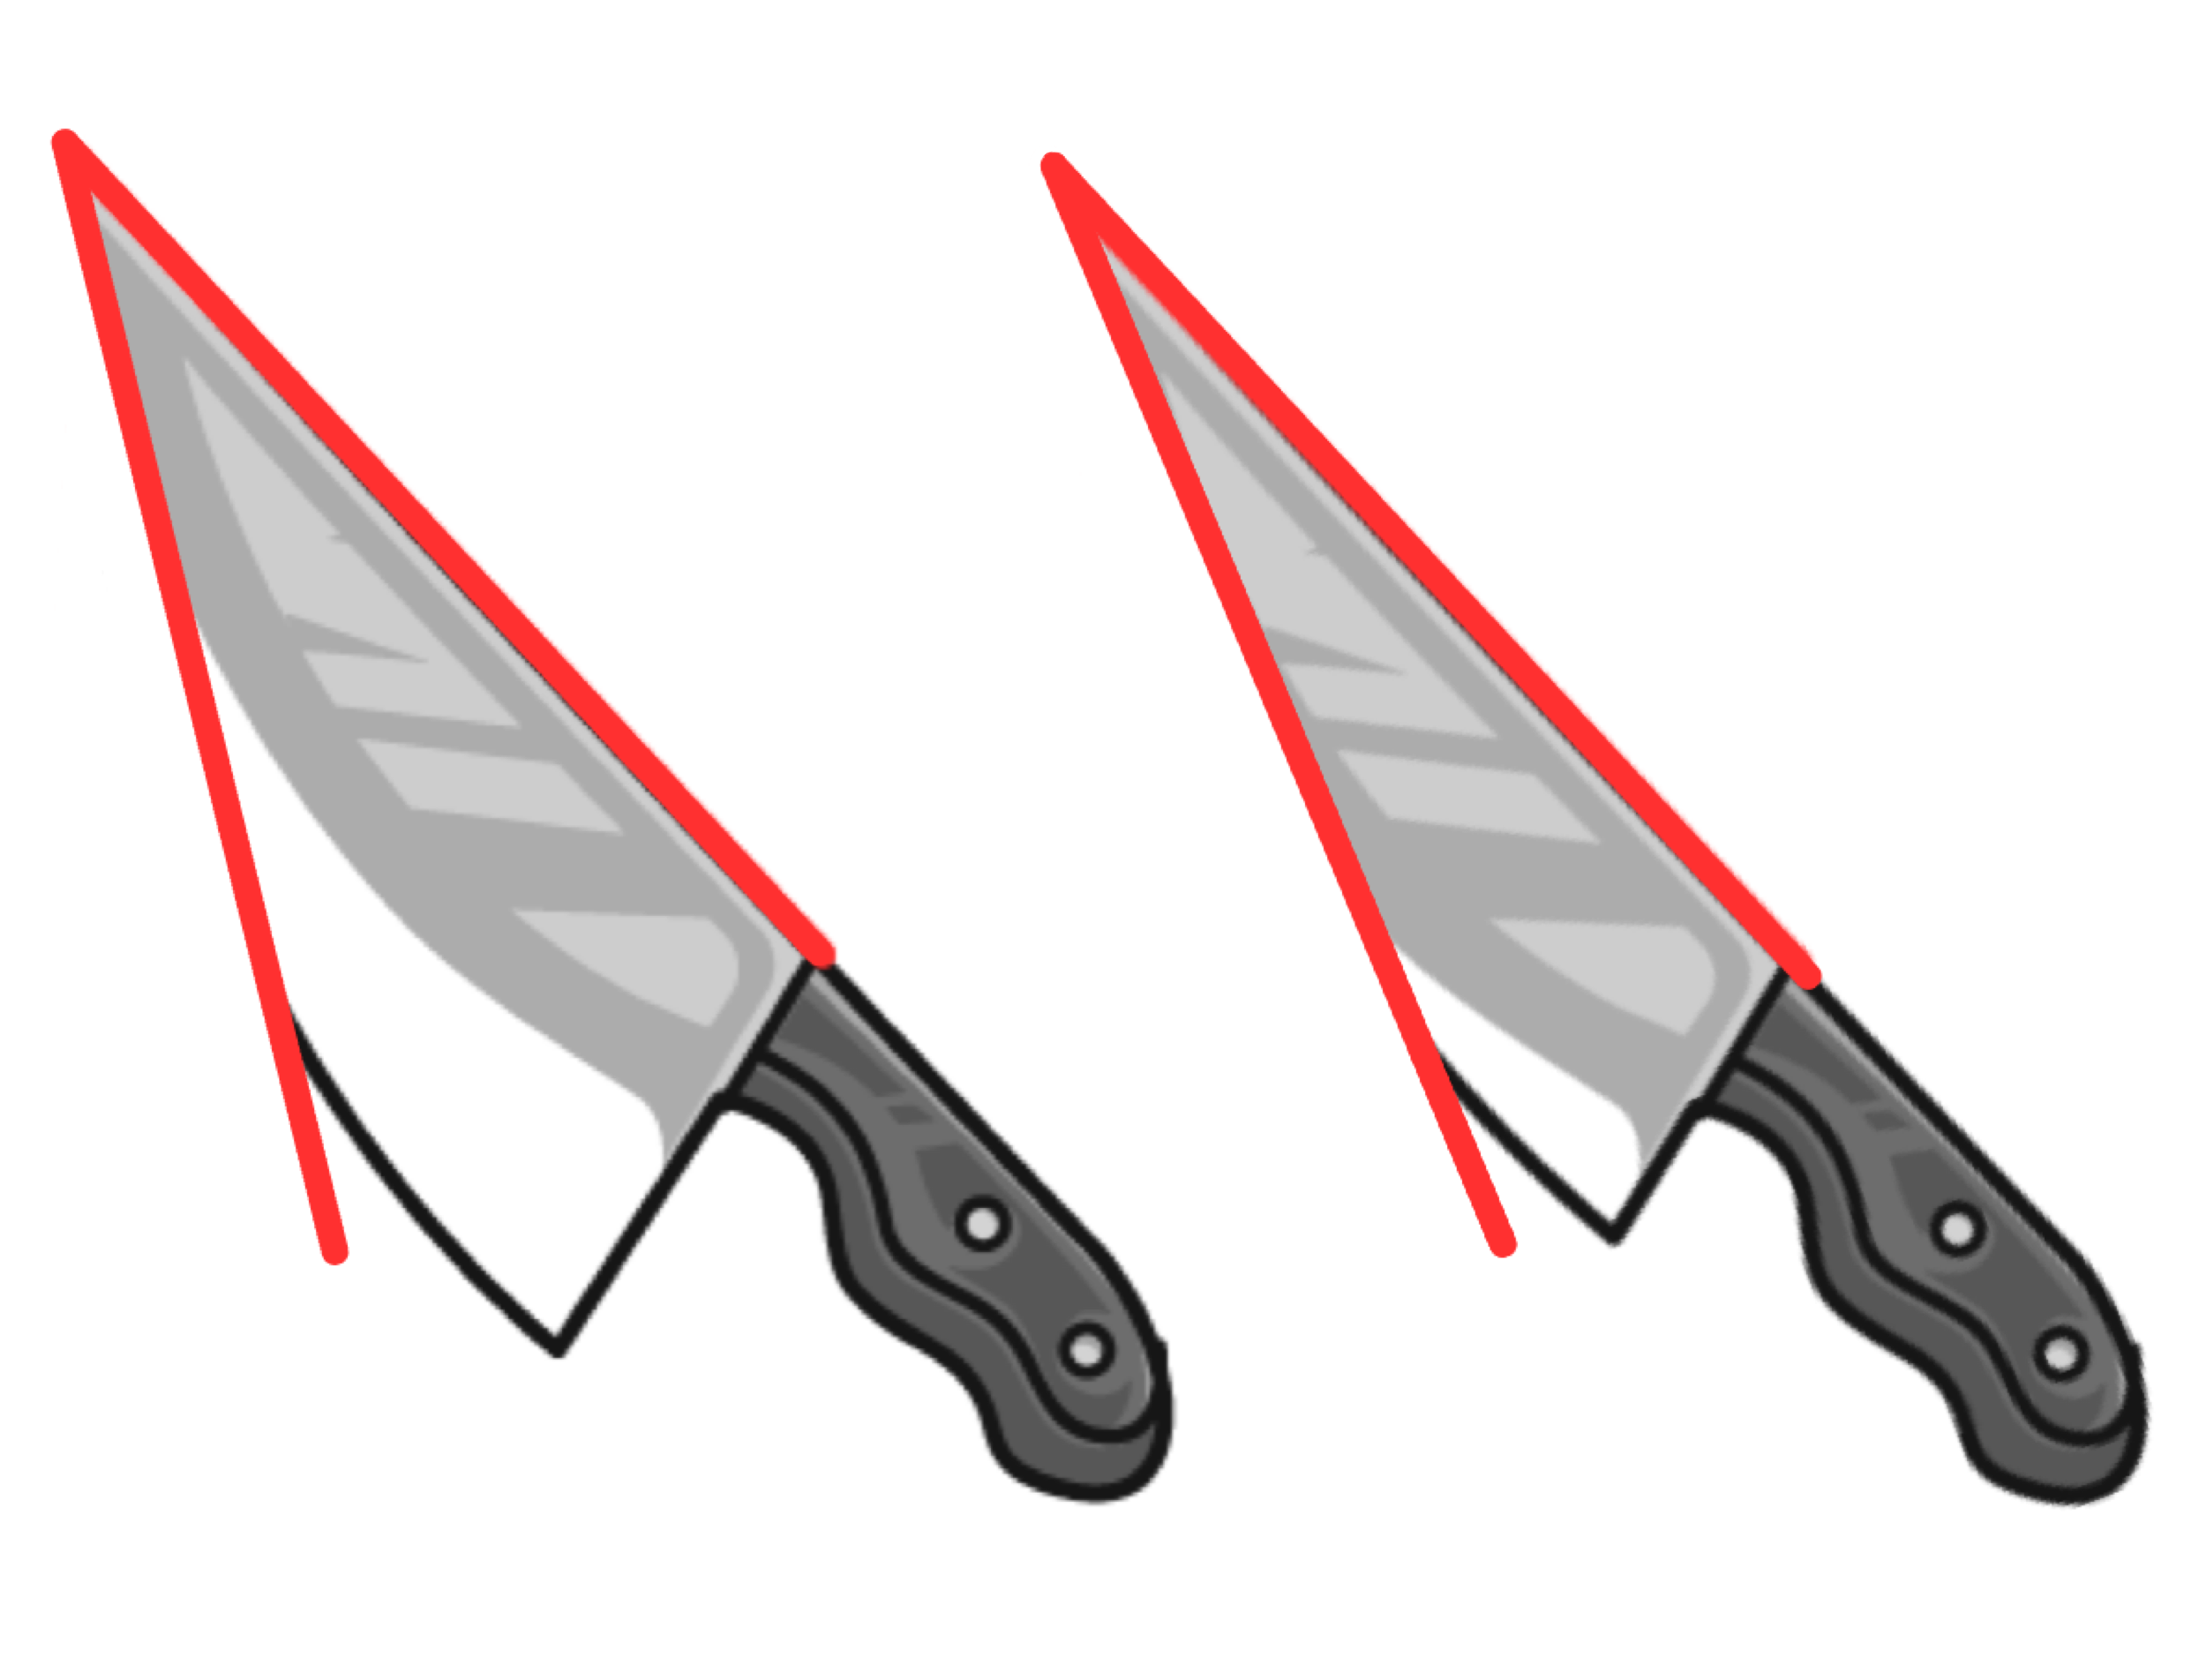
One technique you can use for acute angles is to picture each angle as a knife. The smaller the angle, the sharper the knife’s point will be.
FIGURE 4: KNIFE METHOD ANGLE VISUALIZATION
Alternatively, you may use the laptop method. Visualize each acute angle as a partially closed laptop. Whichever laptop is more closed will represent the smallest angle.
FIGURE 5: LAPTOP METHOD ANGLE VISUALIZATION
For angles that are close to or appear to be right angles, you can employ a different strategy. Try to visualize a line perpendicular to one of the angle’s sides. Now, compare the other side of the angle with the envisioned perpendicular line. The closer this side is to the line, the closer the angle will be to 90°. Using this technique, you can compare multiple angles to each other. In the image below, the red line is perpendicular to the bottom side of each angle, forming a right angle.
FIGURE 6: ENVISIONING A PERPENDICULAR LINE HELPS RANK NEAR-RIGHT ANGLES
When looking at obtuse angles, try to visualize one of the sides continuing straight. Doing so will create an acute angle, and these two angles together are supplementary. Whichever angle has a larger supplementary angle, or is further from the straight line, is the smaller angle.
FIGURE 7: OBTUSE ANGLE VISUALIZATION TECHNIQUE
There is another technique that can be used for all types of angles. This method requires you to visualize which angle could fit inside of the other. For example, could angle A fit inside angle B, or vice versa?
Gain instant access to the most digestible and comprehensive DAT content resources available. Subscribe today to lock in the current investments, which will be increasing in the future for new subscribers.


